

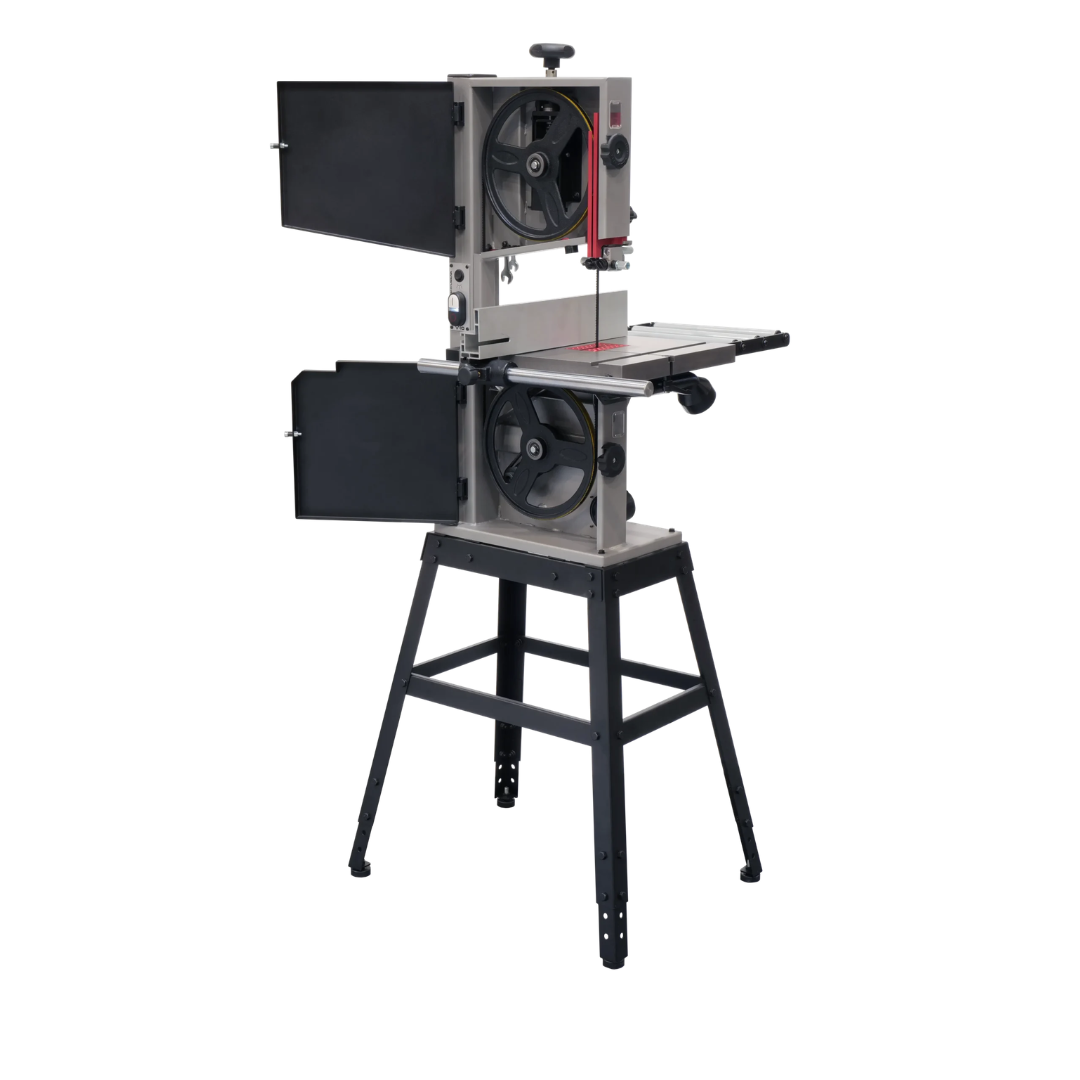
How to Set Up a Stationary Band Saw for Accurate Woodworking Cuts
Getting accurate cuts from your band saw starts long before you feed in the first board. A properly tuned stationary band saw tracks true, resaws without drift, and holds tight tolerances cut after cut. This stationary band saw setup guide walks you through every step, from initial positioning to your first confident test cut. That is true whether you just unboxed a new machine or are retuning a saw that has been in the shop for years. Explore our full selection of band saws if you are still choosing the right machine for your shop.

Quick Answer
Setting up a stationary band saw for accurate woodworking cuts is an eight-step process. First, position and level the machine. Install the correct blade and set blade tension. Adjust tracking. Set the upper and lower blade guides. Square the table. Compensate for blade drift at the fence. Then make a test cut and fine-tune until every pass is consistent.
In This Guide
- What Is a Stationary Band Saw?
- Step 1: Positioning and Leveling
- Step 2: Installing the Blade
- Step 3: Setting Blade Tension
- Step 4: Blade Tracking and Wheel Alignment
- Step 5: Adjusting the Blade Guides
- Step 6: Squaring the Table
- Step 7: Fence Setup and Blade Drift
- Step 8: Test Cuts and Fine-Tuning
- Band Saw Setup Tips for Better Accuracy
- Dust Collection and Maintenance
- Comparison: Top Stationary Band Saws
- Top Band Saw Picks for Woodworkers
- How to Choose the Right Band Saw
- Frequently Asked Questions
- Conclusion
What Is a Stationary Band Saw?
A stationary band saw is a floor-standing or cabinet-mounted machine. It drives a continuous looped blade around two or three wheels to cut wood. Unlike a jigsaw or scroll saw, the stationary band saw excels at resawing thick stock, ripping curved parts, and making long straight cuts with minimal waste. The key word is stationary. These machines stay in one place in the shop, typically bolted to the floor or set on a vibration-dampening base. So every setup decision you make today will affect every cut you make for years.
A correctly set up stationary band saw for woodworking delivers repeatable accuracy and smooth sawn surfaces that need little cleanup. It can also resaw thick planks cleanly. A poorly set up saw, by contrast, produces wavy cuts and burned edges. Its blades wander off the line no matter how carefully you guide the wood. This guide covers stationary band saw alignment and setup tips, from initial installation to ongoing tuning. It helps you get the most from your machine every time you step up to the table.

Step 1: Positioning and Leveling Your Band Saw
Where and how you place your band saw matters more than most woodworkers realize. Start by choosing a location with enough clearance to feed long boards through. Plan for at least four feet on the infeed and outfeed sides. Also plan for at least eighteen inches on each flank for lateral movements. A concrete floor is ideal because it is level and stable. Any solid floor works as long as it does not flex under the machine's weight.
Level the Machine
Place a precision machinist's level on the table in two directions, side to side and front to back. Shim or adjust the leveling feet. Keep going until the table reads within 0.005 inches of level in both planes. A machine that leans to one side causes subtle problems with table tilt and blade tracking. These problems are hard to trace back to their source later.
Anchor or Stabilize the Saw
If your shop floor allows it, bolt the base to the concrete using anchor bolts. If not, fit heavy rubber anti-vibration pads under the feet. These damp the low-frequency vibration that slowly walks cast-iron machines off position. That vibration also contributes to rough sawn surfaces. Check the owner's manual for your saw's electrical requirements. Most 14-inch stationary saws run on either 110V or 220V. Wiring the wrong voltage is a common and costly mistake on new installations.

Step 2: Installing the Blade on Your Stationary Band Saw
Blade choice has a bigger effect on cut quality than almost any other variable. For general woodworking and resawing, use a 3 TPI to 4 TPI hook-tooth or skip-tooth blade. Choose the widest width your saw accepts. That is typically ½ inch for a 14-inch saw, and up to 1 inch on larger models. This gives the best combination of feed rate and surface quality. For curved cuts and tight radii, step down to a narrower blade. Use a ¼-inch or ⅜-inch blade with 6 to 10 TPI.
Installing the Blade
Release the blade tension fully. Turn the tension adjustment knob counterclockwise until the spring or tension indicator shows no load. Open both wheel guard doors. Then loop the blade over the upper wheel first, then around the lower wheel. Thread the blade between the guide bearings above and below the table. Do not tighten the guides yet. Push the blade firmly onto both wheels. Turn the upper wheel by hand one full revolution to check that the blade seats evenly. The teeth should point downward, toward the table, at the front of the saw.

Step 3: Setting Blade Tension Correctly
Blade tension is the single most important adjustment on any stationary band saw setup guide. It is also the step most often rushed or skipped entirely. With too little tension, the blade deflects under load. This produces a bowed cut called "barrel cutting" that leaves the sawn face thicker in the middle than at the edges. With too much tension, you risk fatiguing the blade prematurely, stressing the wheel bearings, and bowing the frame of lighter saws. Fine Woodworking describes a similar deflection check, where about 1/4 inch of movement under finger pressure shows the tension is right.
Most saws include a built-in tension scale. Use it as a starting reference. Then apply the pluck test. With the saw unplugged, reach inside the guard. Pluck the side of the blade like a guitar string, at the midpoint between the upper and lower guide assemblies, and listen. A correctly tensioned blade produces a low, clear musical tone. It also shows about one-quarter inch of lateral deflection when you push it sideways with moderate finger pressure. A floppy, thudding blade is under-tensioned. A high-pitched ping with no deflection at all is over-tensioned. Fine-tune from there.

Step 4: Blade Tracking and Wheel Alignment
Tracking controls where the blade rides on the wheels. The goal is to keep the blade centered on the crown of the upper wheel. On saws with a flat upper wheel, the goal is to run with the gullets (the valleys between teeth) just off the front edge of the wheel. Tracking on most stationary band saws is controlled by a knob or bolt at the top rear of the machine. It tilts the upper wheel forward or backward.
Setting Coarse Tracking
With the saw unplugged, turn the upper wheel by hand while adjusting the tracking knob. Watch the blade's position on the wheel. If it drifts toward the front of the wheel, tilt the top of the wheel slightly backward (away from you). If it drifts toward the back, tilt it forward. Work in small increments: quarter turns on the adjustment knob. Keep turning the wheel by hand until the blade holds a stable position through multiple rotations.
Fine-Tuning Under Power
Once coarse tracking is stable, close the guard doors, plug in the saw, and run it briefly at speed. Watch the blade through the inspection window. It should hold its position on the wheel without wandering. If it creeps, make additional small adjustments to the tracking knob while the saw runs. Consult your owner's manual to confirm your saw allows live tracking adjustments. Set up stationary band saw blade tension, tracking, and guides in this order: tension first, then tracking. That is the correct sequence. Reversing it means you will redo the tracking after tensioning anyway.

Step 5: Adjusting the Blade Guides
Blade guides are the bearings or blocks that keep the blade from twisting, deflecting sideways, or drifting under load. Every stationary band saw has two guide assemblies. One is above the table (the upper guide post, which moves up and down). The other is below the table (the lower guide, which is fixed). Each assembly has three contact points: two side guides and one thrust bearing positioned behind the blade.
Setting the Thrust Bearings
Start with the thrust bearing. This is the round bearing (or cylindrical bearing on older saws) directly behind the blade. With the saw off, set it so it just clears the back of the blade by the thickness of a dollar bill, approximately 0.004 inches. This gap lets the bearing spin freely when the blade is not under load. Then it engages under cutting pressure. That keeps the blade from being pushed backward into the wheels.
Setting the Side Guides
The two side guide bearings (or ceramic/steel guide blocks on some saws) sit just forward of the blade's gullets. They never touch the teeth. They clear the blade by a hair, roughly 0.004 inches on each side. Here is a useful field test. Slip a single sheet of paper between the side guide and the blade. If the paper slides through with slight friction but no binding, the gap is correct. Adjust the lower guide assembly first. Then raise the upper guide post to about one quarter inch above the workpiece height you plan to cut. Set those guides the same way.

Step 6: Squaring the Band Saw Table
A table that is not perpendicular to the blade produces cuts that are beveled when they should be square. Squaring the table is straightforward. It must be done every time you change blades. The same goes for any significant adjustment to tension or tracking. Those changes can shift the blade's effective plane slightly.
Unplug the saw. Hold a reliable machinist's square or engineer's square flat against the side of the blade. Place it between teeth, not on them. Check the angle at the table surface. The blade and the table should meet at a crisp 90 degrees. Loosen the table tilt lock (usually a large bolt or lever beneath the table). Adjust the table angle until the square reads true, then retighten the lock. Recheck after tightening, since tightening can shift the table slightly. Check from both the front edge and the back edge of the table to confirm there is no twist. Once you confirm 90 degrees in all checks, reset your table's zero stop (a small set-screw on most saws). This lets you return to square quickly after making bevel cuts.

Step 7: Setting the Fence and Compensating for Blade Drift
Blade drift is the natural tendency of a band saw blade to cut at a slight angle to the miter slot. It is not a defect. It is a property of every band saw blade, due to the way the teeth are set and ground. If you set your fence parallel to the miter slot and ignore drift, the cuts will push against the fence on one side. This causes burning, wandering, and inaccuracy. The solution is to find your blade's drift angle and set the fence to match it.
Finding the Drift Angle
Scribe a straight pencil line parallel to the long edge of a scrap board. Feed the board freehand, without using the fence. Keep the pencil line directly on the blade. Do not force it. Let your hands naturally follow the line. When you are two inches past the middle of the cut, stop the saw. Hold the board exactly where it is. The angle between the board's edge and the miter slot is your blade's drift angle. Use a bevel gauge to capture that angle.
Setting the Fence to the Drift Angle
Adjust the fence so its face matches the drift angle you captured. Most quality band saw fences allow the face to pivot slightly to accommodate drift. You can also clamp a straight-edged board to the table at the drift angle and use it as a temporary fence. Once set, make a test rip cut following the fence. The board should feed with consistent, light pressure all the way through without wandering or burning. If it resists, adjust the fence angle a degree at a time until the cut flows freely.

Step 8: Making Test Cuts and Fine-Tuning
Before cutting any project wood, spend fifteen minutes on scrap pieces that match your intended workpiece in thickness and species. Make three test cuts: a straight rip, a gentle curve, and a narrow-kerf cut near the full height of the blade's exposure. Evaluate each cut for:
- Consistent width: Measure the cut piece at the leading end, middle, and trailing end. All three measurements should be within 0.005 inches of each other. Taper in width indicates blade deflection from insufficient tension or guides set too wide.
- Surface quality: The sawn face should show clean, parallel marks from the blade teeth. A wavy surface with irregular marks means the blade is fluttering. Increase tension slightly. Burning on the surface means the blade is dull or over-guided (side guides touching the blade). It can also mean you are feeding too slowly.
- Square sawn face: Check the sawn face with a square. If the cut is beveled, recheck your table and blade alignment from Step 6.
This is the iterative part of how to tune a stationary band saw for accurate cuts. Make a cut, measure, and adjust one variable. Then make another cut. Once all three test cuts pass, you are ready for project wood.

Band Saw Setup Tips for Better Accuracy
These stationary band saw alignment and setup tips go beyond the core eight steps. They will help you get more from your machine over time.
Keep the Upper Guide Post Low
Set the upper guide assembly to about one quarter inch above the workpiece, every single cut. The farther the upper guide is from the table, the more unsupported blade there is between the guides. So that unsupported span can deflect more. Dropping the guide post takes only seconds. It meaningfully reduces blade wander, especially on narrow blades cutting thick stock. OSHA's woodworking guidance also says to adjust the blade guide post to fit the stock thickness.
Replace Blades Before They Are Dull
Band saw blades are consumables. A blade that starts burning wood or requiring noticeably more feed pressure is already past its peak performance. Dull blades force you to push harder. This creates heat, drift, and rough sawn surfaces regardless of how well the rest of the machine is tuned. Quality bi-metal or carbide-tipped blades last significantly longer than standard carbon steel blades on hardwoods.
Wax the Table
A light coat of paste wax on the cast iron table dramatically reduces friction. This lets workpieces glide smoothly, without the hesitation that can pull the blade off line. Apply wax with a rag, buff it off with a clean cloth, and repeat every few sessions. Paste wax also protects cast iron from rust in humid shops.
Re-Tune After Every Blade Change
A new blade will have slightly different tension, tracking, and drift characteristics. That is true even for a blade of identical spec. Get in the habit of running through at minimum Steps 3, 4, 5, and 7 after every blade swap. Do this before making a first cut. The full eight-step setup guide is best for a new installation or a machine that has been moved. The abbreviated four-step re-tune is enough for routine blade changes.
Dust Collection and Maintenance
Band saws produce fine sawdust that accumulates quickly inside the lower cabinet. It coats the lower wheel, tires, and drive components. Connect a shop vacuum or dust collector to the lower dust port before every session. Even a modest 1.5-inch shop vac hose makes a significant difference in how cleanly the machine runs. Accumulated sawdust on the lower wheel tires changes their effective diameter over time. This subtly alters blade tracking.
Open the lower cabinet and blow it out with compressed air every month. Do it more frequently when resawing softwoods like pine, which produce high volumes of resinous dust. Inspect the wheel tires for cracks or glazing. The wheel tires are the rubber or urethane bands that cushion the blade. Replace worn tires promptly. A hardened, cracked tire causes blade bounce and poor tracking that no amount of adjustment will fix. Lubricate the blade guide bearings and the tension adjustment mechanism annually per your owner's manual. This keeps all adjustments smooth and precise.

Comparison: Top Stationary Band Saws for Woodworking
Choosing the right stationary band saw shapes every future setup experience. Larger wheels mean smoother tracking. More horsepower means cleaner resawing of thick hardwood. The four saws below range from capable entry-level machines to professional-grade workhorses. All are available in our band saw collection.

| Model | Price | Throat Width | Resaw Height | Motor | Best For |
|---|---|---|---|---|---|
| Laguna V:10 | $649 | 9-5/8" | 5.75" | 1 HP | Entry-level shops, curved cuts |
| Laguna 14|12 | $1,699 | 13-5/8" | 13" | 1.75 HP | Mid-size shops, resawing up to 13" |
| Laguna 14|BX | From $2,149 | 13-5/8" | 13" | 1.75 HP (110V) or 2.5 HP (220V) | Serious resawing, production shops |
| Maksiwa SF.35.MI | $2,399 | 13-1/2" | 12" | 1.75 HP | Pro woodworking, cast iron build |
Top Stationary Band Saws for Woodworkers
Each of the saws below responds well to the setup steps described in this guide. They are listed in order from most accessible to most capable.
1. Laguna V:10 Bandsaw MBAND10V10 — $649
The V:10 is Laguna's entry-level stationary saw. It sets up cleanly with the steps in this guide. The 9-5/8-inch throat gives enough clearance for most hobby woodworking, and the guides adjust quickly. It is ideal for small shops that prioritize curved cuts, joinery parts, and occasional resawing up to 5.75 inches. View more >

2. Laguna 14|12 Bandsaw MBAND1412-175 — $1,699
The 14|12 is one of the most popular stationary band saws in mid-size woodworking shops. The 14-inch wheel diameter produces smooth blade travel. The 13-inch resaw height handles almost any board you would encounter in furniture making or cabinetry. The enclosed cabinet base keeps the lower works clean, and the tracking adjustment is precise. View more >

3. Laguna 14|BX Bandsaw — From $2,149
The 14|BX steps up to a 2.5 HP motor on 220V (1.75 HP on 110V). It has 13 inches of resaw height. This makes it the right tool for shops that resaw thick slabs of walnut, maple, or cherry on a regular basis. The larger motor maintains consistent blade speed under load. This is critical for clean sawn surfaces on hard, dense woods. If you're following this stationary band saw setup guide on a 14|BX, pay extra attention to blade tension. The added motor power lets you run heavier blades that need higher tension settings. View more >
4. Maksiwa SF.35.MI 14" Bandsaw — $2,399
The Maksiwa SF.35.MI offers 12 inches (310 mm) of resaw height. It is built with a full cast iron table and wheels that provide exceptional vibration damping. This is a direct benefit to cut quality and blade life. It uses upper and lower ball-bearing blade guides, which you set with the paper-gap test from Step 5. It is a top choice for professional shops that demand the cleanest sawn faces and the most flexible setup range. View more >
How to Choose the Right Stationary Band Saw
The best stationary band saw for your shop matches the cuts you plan to make most often. Use these four criteria to narrow the field.
Resaw Height
Resawing means slicing thick boards into thinner slabs or bookmatched panels. If it is central to your workflow, prioritize resaw height above all else. The Laguna 14|BX and the Laguna 14|12 at 13 inches handle standard 12-inch-wide boards with room to spare. The Maksiwa SF.35.MI at 12 inches (310 mm) handles them with no margin. That still covers most furniture lumber. The Laguna V:10's 5.75-inch capacity is ample for curved parts and smaller stock.
Motor Power
More horsepower means less speed loss under load. This translates directly to smoother sawn surfaces and less burning on dense hardwoods. If your shop primarily processes softwoods, poplar, or thin stock, 1.75 HP is plenty. For regular hardwood resawing (walnut, maple, white oak), step up to 2 HP or more.
Wheel Material and Diameter
Cast iron wheels, like those on the Maksiwa SF.35.MI and Laguna 14|BX, have more flywheel mass than stamped-steel wheels. This smooths out the blade speed and reduces vibration. Larger wheel diameters (14 inches versus 10 inches) also extend blade life. This is because the blade bends around a more gradual radius each revolution.
Guide System Quality
Roller bearing guides are easier to set precisely than ceramic blocks. They also last longer in high-use shops. Check that the guide post moves smoothly and locks firmly. A sloppy upper guide post that creeps down under vibration defeats the purpose of careful setup.

Frequently Asked Questions
How often should I tune my stationary band saw?
Run through the abbreviated re-tune every time you change blades. That means tension, tracking, guides, and drift. Do a full eight-step setup whenever you move the machine, change to a significantly different blade width, or notice a change in cut quality. For a saw that stays in place with the same blade, a quick guide and tension check is sufficient. Do it every month of regular use.
Why is my band saw blade drifting even with the fence set?
Drift that appears even with a correctly set fence usually points to one of three causes. The first is that the blade is dull and pushing sideways rather than cutting cleanly. The second is that the side guides are set too far from the blade, allowing it to flex under feed pressure. The third is that the blade tension is too low. Work through Steps 3 and 5 of this setup guide. Then re-establish your fence angle with the drift-finding procedure in Step 7.
What TPI blade should I use for resawing hardwood?
For resawing hardwood on a 14-inch stationary band saw, use a 3 TPI to 4 TPI hook-tooth or variable-pitch blade. Choose the widest width your saw accepts, typically ¾ inch or 1 inch. Fewer teeth per inch means larger gullets. These clear sawdust efficiently from deep cuts, which keeps the blade cool and prevents burning. Use 6 TPI to 10 TPI for curved cuts where a narrower blade is needed.
Can I use a band saw for curved cuts after setting it up for resawing?
Yes, but swap the blade. A wide resaw blade (½ inch to 1 inch) cannot make tight curves. For curves, install a ¼-inch or ⅜-inch blade and re-run Steps 3 through 7. The setup process is the same regardless of blade width. The adjusted values will differ with each blade. These values are tension, guide clearance, and drift angle. Keep a log of your settings for each blade you own to speed up future swaps.
What is the correct blade tension for a stationary band saw?
Correct blade tension for a stationary band saw is the point at which the blade produces a low musical tone when plucked. It is not a flop or a guitar-string ping. The blade also deflects about one quarter inch laterally with moderate finger pressure at the midpoint between guides. Use your saw's tension scale as a starting reference. Then fine-tune with the pluck test described in Step 3 of this guide. Over-tensioning stresses wheel bearings and can bow lighter saw frames.
Do I need to square the table every time I change blades?
Yes. Check table square after every blade change. The table itself does not move during a blade swap. Even so, different blades run slightly differently on the wheels. They can shift the effective cutting plane. A quick check with a machinist's square takes under a minute. It prevents an entire project's worth of beveled joints that need to be planed or sanded flat.
Conclusion
Setting up a stationary band saw correctly is the difference between a tool that frustrates you and one that expands what you can build. Work through the eight steps in order: position, blade, tension, tracking, guides, table square, fence drift, test cut. Then you will have a machine that holds accurate lines through hardwood resaws, tight curves, and everything in between. Bookmark this stationary band saw setup guide. Return to it each time you change blades or retune the machine. Ready to choose a saw? Browse our full lineup of band saws to find the right machine for your shop and budget.
Related collections: Stationary Band Saws, Wood Band Saws and Bandsaw Blades.
Related Reading
Featured Stationary Band Saws


Will your saw track true without drifting?
Bring your tension, guide or table squaring questions to our team. We will help.